Mini Internet
Mini Internet
Ringkasan Projek
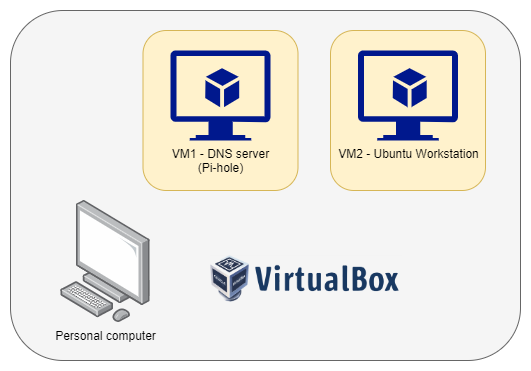
Bina lab persekitaran maya seperti gambar rajah di bawah.
Install Oracle VirtualBox
- Muat turun dan install Oracle VirtualBox di Downloads – Oracle VM VirtualBox
- Tonton video ini How to Install VirtualBox on Windows 10 - YouTube
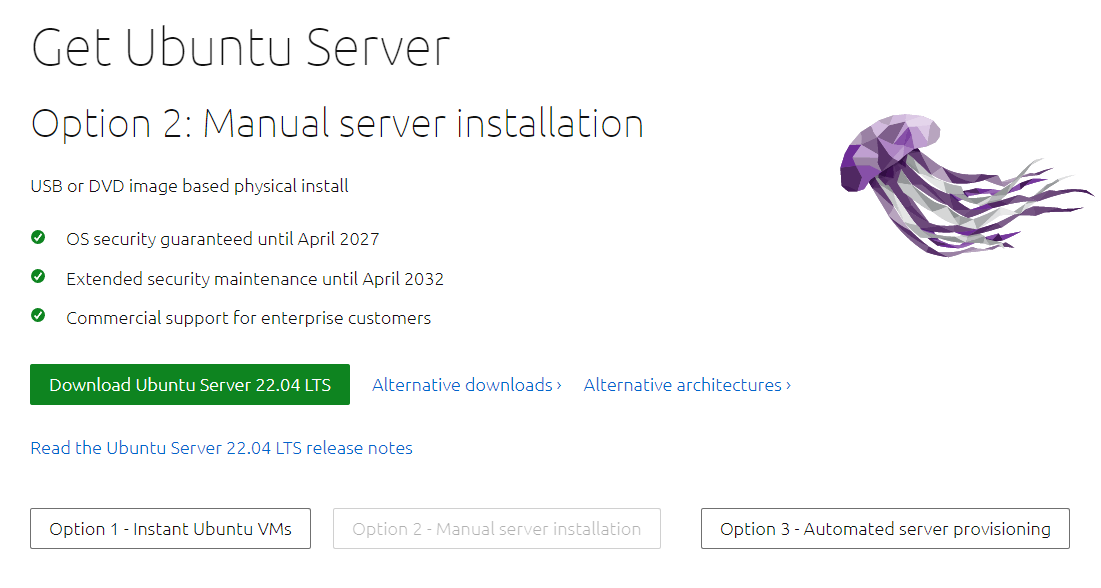
Muat turun file ISO Ubuntu Server
Muat turun file ISO Ubuntu Server di Get Ubuntu Server
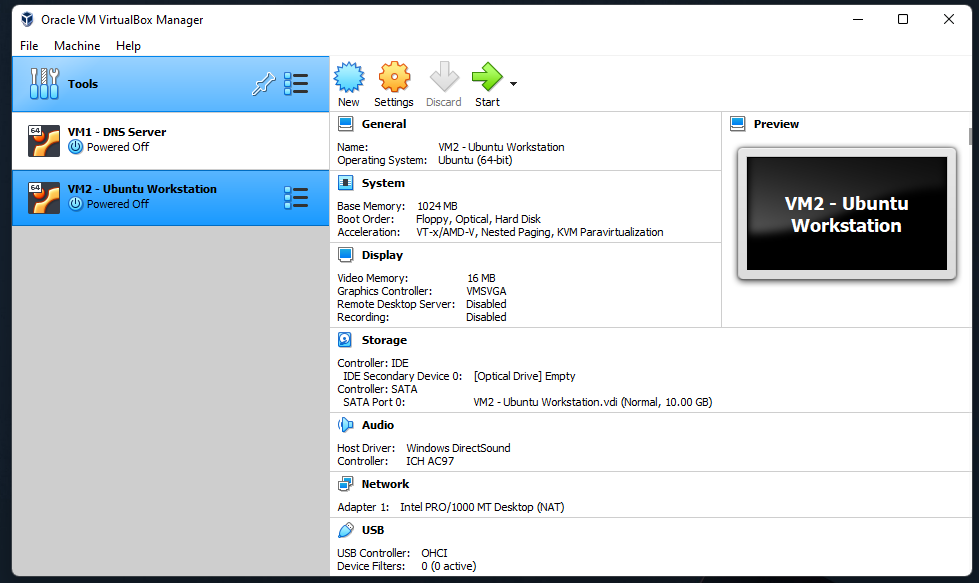
Bina Virtual Machine 1 dan Virtual Machine 2
- Tonton video ini Install Ubuntu Server 20.04 LTS on VirtualBox dan bina dua Virtual Machine seperti berikut.
Setup VM2 - Ubuntu Workstation
- SSH ke server VM2 dan install docker.
1
2
sudo apt install docker.io
sudo apt install docker-compose
- Install Wordpress mengunakan docker. Lihat disini Wordpress Zarif Rani
- Layari Wordpress interface.
Setup VM1 - DNS Server
- SSH ke server VM1 dan install docker.
1
2
sudo apt install docker.io
sudo apt install docker-compose
- Bina Pi-hole menggunakan docker
1
2
3
4
mkdir pi-hole
cd pi-hole
touch docker-compose.yaml
nano docker-compose.yaml
1
2
3
4
5
6
7
8
9
10
11
12
13
14
15
16
17
18
19
20
21
22
23
24
version: "3"

# More info at https://github.com/pi-hole/docker-pi-hole/ and https://docs.pi-hole.net/
services:
  pihole:
    container_name: pihole
    image: pihole/pihole:latest
    # For DHCP it is recommended to remove these ports and instead add: network_mode: "host"
    ports:
      - "53:53/tcp"
      - "53:53/udp"
      - "67:67/udp" # Only required if you are using Pi-hole as your DHCP server
      - "80:80/tcp"
    environment:
      TZ: 'America/Chicago'
      # WEBPASSWORD: 'set a secure password here or it will be random'
    # Volumes store your data between container upgrades
    volumes:
      - './etc-pihole:/etc/pihole'
      - './etc-dnsmasq.d:/etc/dnsmasq.d'
    #   https://github.com/pi-hole/docker-pi-hole#note-on-capabilities
    cap_add:
      - NET_ADMIN # Recommended but not required (DHCP needs NET_ADMIN)
    restart: unless-stopped
- Run docker-compose
1
sudo docker-compose up
- Layari admin web interface Pi-hole di http://VM1-ip/admin
- Login ke admin interface. (Password admin boleh didapati dengan melihat log docker pihole)
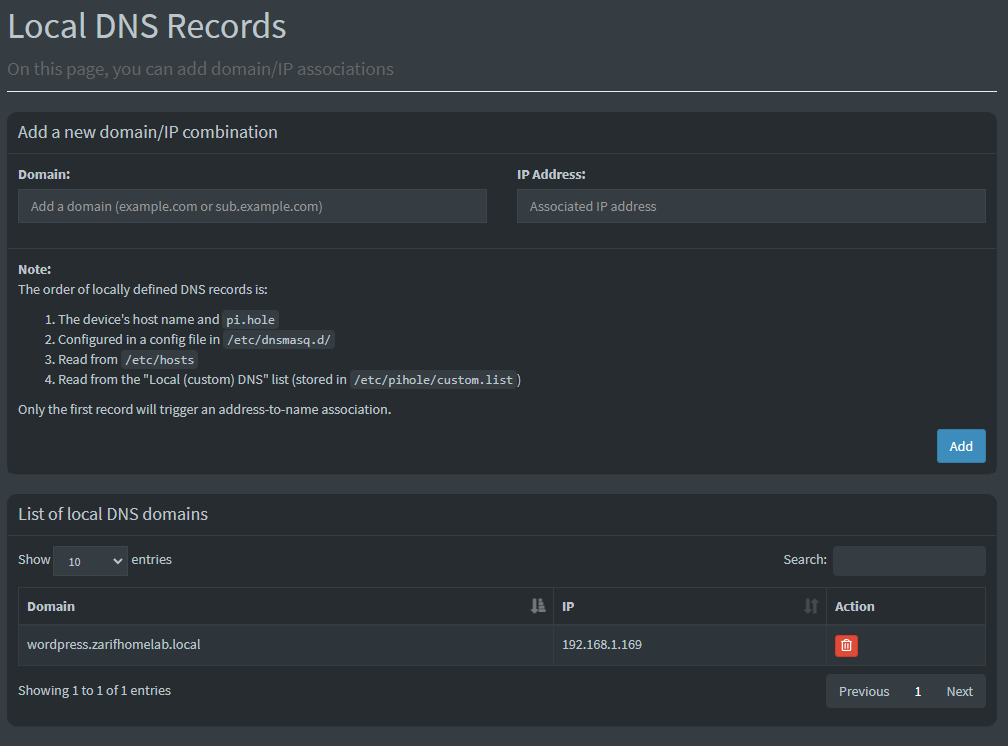
- Pergi ke
Local DNS > DNS Recordsdan tambah domain anda berserta IP VM2.
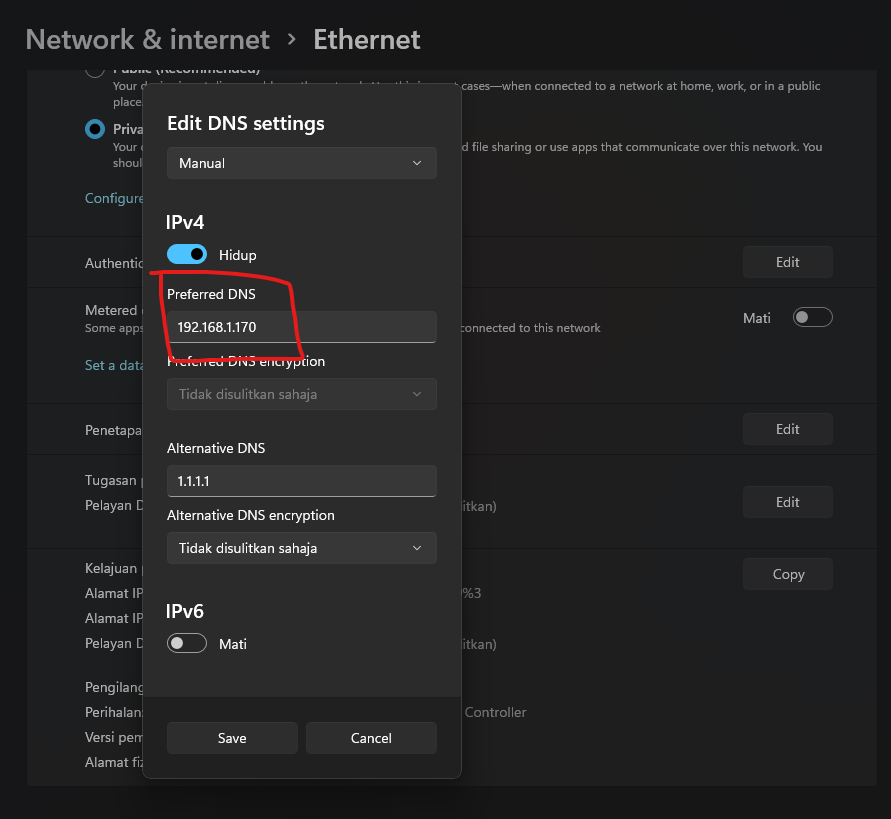
Kemaskini Pelayan DNS PC
- Untuk komputer Windows, pergi ke
Setting > Network & internetdan masukkan alamat IP VM1 - DNS.
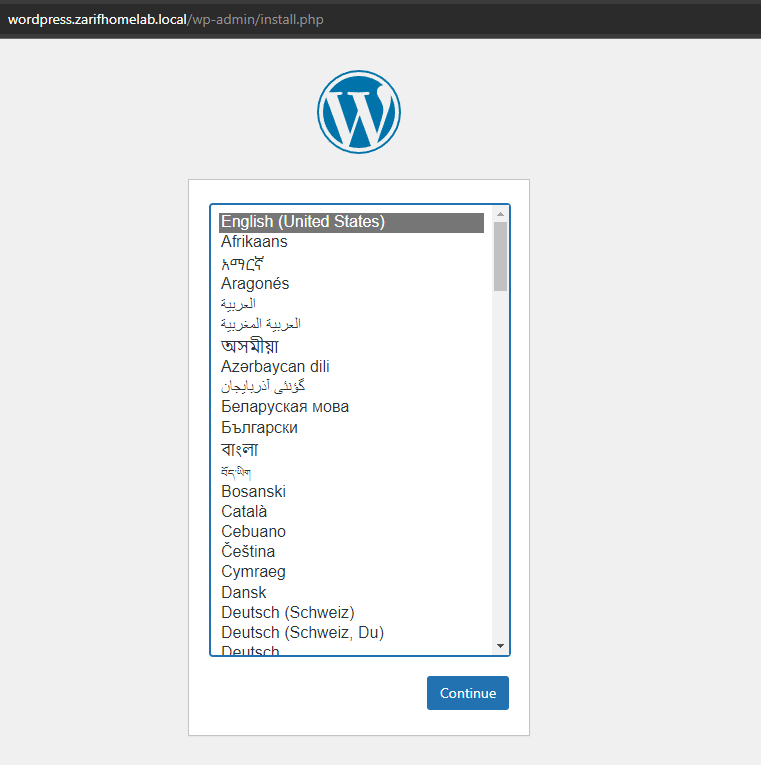
Cubaan
- Layari alamat yang anda masukkan didalam Pi-hole. (wordpress.zarifhomelab.local dalam kes ini)
- Ianya akan keluar seperti berikut jika tiada masalah.
Pos ini dilesenkan di bawah
CC BY 4.0
oleh penulis.